
Avoid Voltage Drop: Decide 12V or 24V Lighting With Simple Math
Avoid Voltage Drop: Decide 12V or 24V Lighting With Simple Math
For most home LED strip projects, 12V wins on short runs under 16 feet where you need tight cut precision or vehicle compatibility, while 24V wins on longer continuous runs and architectural lighting where fewer power feeds and lower current matter more. Whichever you pick, always match strip voltage exactly to the driver and build in a 20% wattage buffer before you size anything.
TL;DR:
- Longer 24V LED strips can typically run up to 10 to 15 meters before voltage drop causes noticeable dimming, unlike most 12V strips that max out around 5 meters.
- Matching the power supply wattage to the total strip load with a 20% buffer prevents early driver failure and ensures reliable operation.
- Thinner wiring can safely handle 24V strips pulling half the current of 12V strips at the same wattage, reducing heat and voltage drop issues.
- Cutting intervals are roughly every 3 LEDs on 12V strips and every 6 LEDs on 24V strips, affecting installation precision and control options.
- For projects over 5 meters or requiring fewer power feeds and longer runs, 24V systems are more efficient and easier to install securely.
12V vs 24V Lighting: What the Voltage Rail Actually Controls
Both 12V and 24V LED strips run on constant voltage. The power supply holds output steady at that number, and the strip’s built in resistors regulate how much current flows to each LED segment. The rail voltage you choose doesn’t change how bright the strip can get. It changes how much current has to travel through the copper to deliver that brightness.
That distinction comes straight from the power formula: watts equal volts times amps, or P = V × I. Say you need a strip pulling 60 watts. At 12V, that strip draws 5 amps. At 24V, the same 60 watts only draws 2.5 amps. Same light output, half the current.
Lower current matters because current, not voltage, is what generates heat and voltage drop in wiring. A few practical results follow from that math:
- Thinner wire can safely carry a 24V strip’s current load than the equivalent 12V strip.
- Connectors and solder joints run cooler on 24V circuits pulling the same wattage.
- Power supplies for 24V systems can often be smaller and less expensive per watt delivered.
None of this makes 24V “better” light. It makes 24V a more efficient way to move that light’s power over distance.
How Far Can You Run a Strip Before Voltage Drop Kills It?
Voltage drop shows up as a dimming gradient. Feed power into one end of a long strip and the far end noticeably yellows or dims because resistance in the copper traces eats voltage before it reaches those last LEDs. The longer the run and the higher the current, the worse the effect.
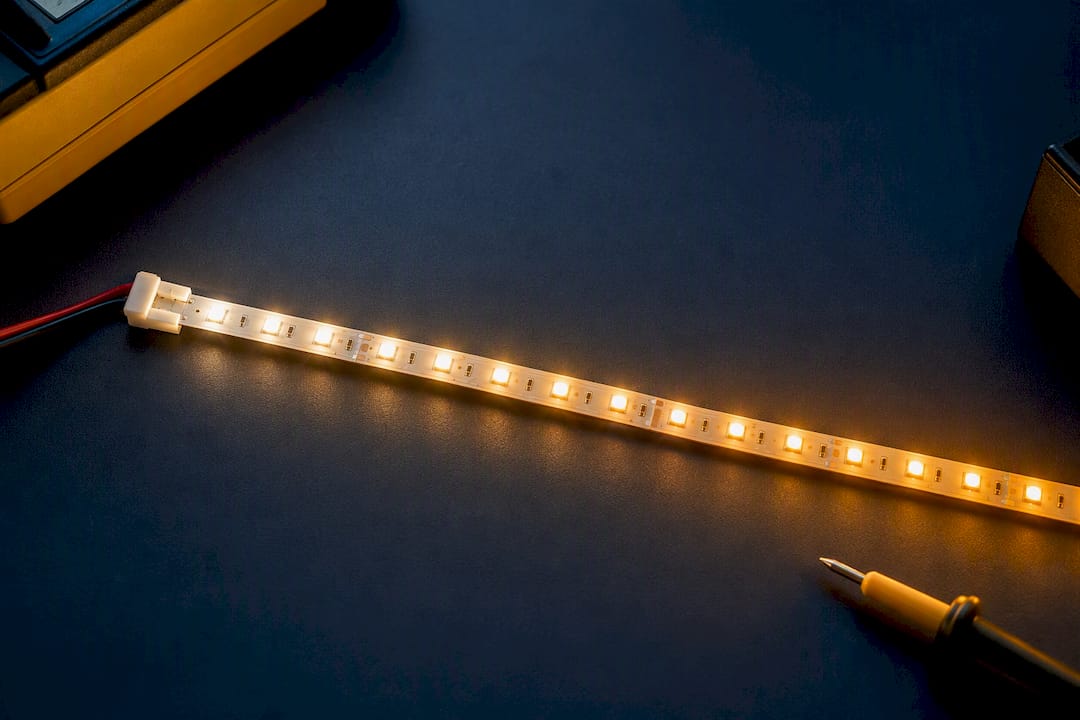
Statistic Callout: Because 24V strips draw half the current of a 12V strip at the same wattage, they suffer less resistance loss and support meaningfully longer single-feed runs before dimming becomes visible.
Typical single-feed maximums, though these shift with the strip’s watts per meter:
- Many 12V strips: around 5 meters (about 16 feet) per feed before drop becomes noticeable.
- Many 24V strips: roughly 10 to 15 meters (32 to 50 feet) per feed, depending on wattage density.
- Higher watt-per-meter strips (dense RGB or high-CRI tape) shorten these numbers on either rail.
Manufacturer specs for both rails confirm this pattern, with 12V strips maxing out near 5 meters and 24V strips reaching closer to 10 meters per single feed under typical loads.
When a project exceeds those lengths, you have two options: inject power at the midpoint or far end of the run using extension wire back to the same supply, or split the run into separate zones each fed by its own driver. Power injection is cheaper for one long continuous strip. Separate zones give you independent control, which matters if you want different sections dimmed differently.
How Do You Calculate the Right Power Supply and Wire Gauge?
Sizing a driver wrong is the single most common reason DIY LED installs fail early. The math isn’t hard, but skipping the buffer step is what causes premature driver failure.
- Add up total wattage. Multiply the strip’s watts per meter by total meters used. A 14.4W/m strip running 8 meters needs 115.2 watts.
- Apply a 20% buffer. Multiply by 1.2, giving you 138 watts. This headroom keeps the driver from running at its thermal ceiling constantly, which shortens its life.
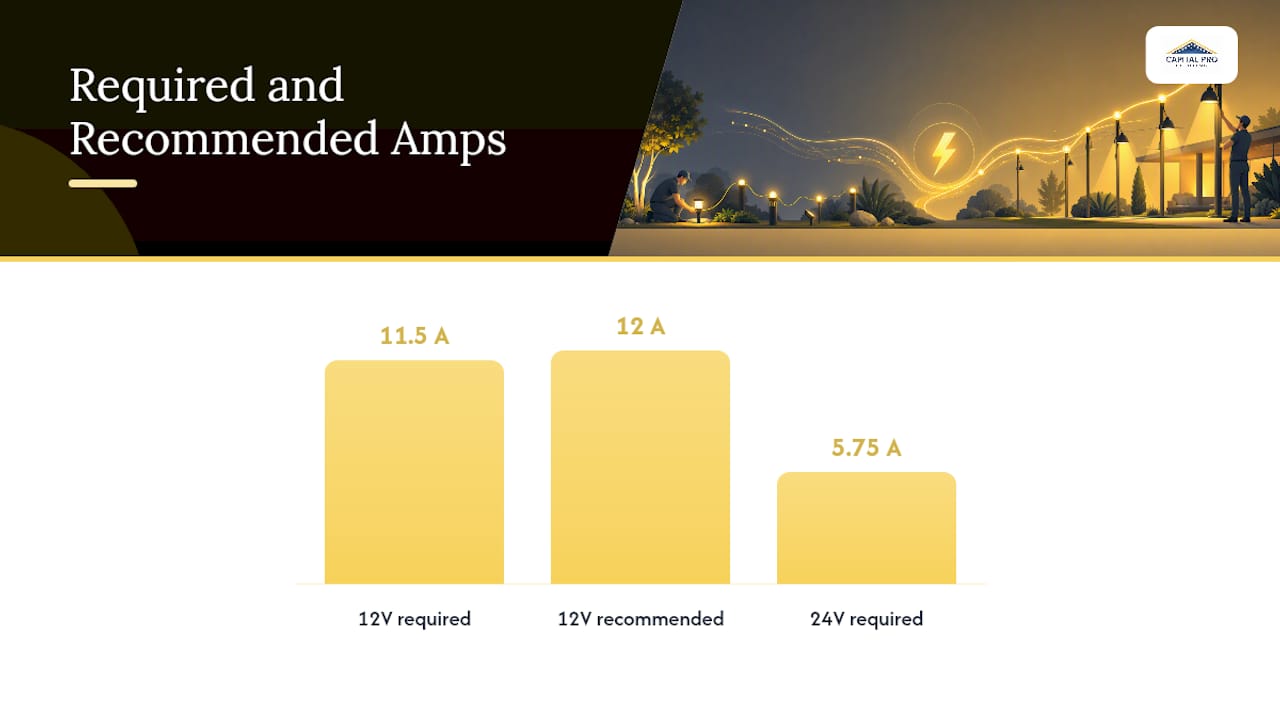
- Convert to amps for your rail. Divide watts by voltage: 138W ÷ 12V = 11.5A, or 138W ÷ 24V = 5.75A.
- Pick a driver rated at or above that amperage. Round up to the nearest common size, such as a 12A or 6A unit.
- Size the wire to the amperage and distance, not just the voltage. A 12V run pulling over 10A at any real distance needs 14 AWG or heavier; a 24V run at half that current can often use 16 or 18 AWG over the same distance without excess drop.
Statistic Callout: Wiring reference tables built for LED installs consistently recommend a 20% power supply buffer as standard practice, not an optional safety margin.
One more distinction worth knowing: constant-voltage drivers (the type used for nearly all 12V and 24V strips) differ from constant-current drivers used in some high-power fixtures. Don’t mix the two. And if you’re running an RGB or addressable controller, keep grounds common across the driver, controller, and strip. A floating ground is a classic source of flickering that looks like a bad strip but is actually a wiring mistake.
Do Cut Points and Controllers Work the Same on Both Rails?
Cut intervals differ because of how the LEDs are grouped into resistor circuits. On most 12V strips, you can cut roughly every 3 LEDs. On most 24V strips, the cut interval is roughly every 6 LEDs, since the strip needs more LEDs in series to use the higher voltage efficiently.
That has a real design consequence: 12V gives you finer control over exact lengths in tight spaces like cabinet interiors or stair nosing, where a few centimeters matter.
- Addressable, individually controllable LED strips (the kind that run chase and color effects pixel by pixel) are far more common in 5V and 12V families than in 24V.
- 24V addressable options exist but are a smaller product category, which can limit your choice of effects and controllers if you commit to 24V for a project needing pixel mapping.
- Never connect a strip to a driver of the wrong voltage; a 24V strip on a 12V supply will barely light, and a 12V strip on a 24V supply will burn out almost immediately.
If pixel-level animation matters more to you than run length, that alone can tip the decision toward 12V even on a longer project.
12V vs 24V Comparison: Strengths and Trade-offs
Brightness comes from watts per meter, not from the rail voltage itself. A 12V strip and a 24V strip rated at the same W/m throw the same light. What changes is everything around that number.
12V advantages:
- Finer cut precision for tight, custom spaces
- Broadest selection of addressable and RGB controllers
- Typically the lower cost of entry for small projects
12V disadvantages:
- Shorter single-feed runs before voltage drop
- More power feeds needed on longer installs, meaning more drivers and wiring
24V advantages:
- Longer continuous runs per feed
- Lower current draw, meaning less heat and thinner wire options
- Fewer feed points on architectural or perimeter runs, which saves labor
24V disadvantages:
- Fewer addressable controller options
- Coarser cut intervals for custom fitting
The practical takeaway: pick your watts per meter for the brightness you want first, then choose the rail based on run length and control needs, not the other way around.
Which Voltage Should You Choose? A 6-Question Framework
Run through these before you buy anything:
- How long is the total run, end to end? Under 5 meters per feed favors either rail; beyond that, 24V starts winning on wiring simplicity.
- What watts per meter do you need for the brightness you want? This sets your total wattage regardless of rail.
- How many cuts will you need, and how tight are the spacing requirements? Frequent, precise cuts favor 12V.
- What power access already exists near the install location? Fewer accessible outlets favor 24V’s longer reach per feed.
- Does the install go outdoors or somewhere exposed to moisture? Confirm IP rating (IP65 or higher for damp locations, IP67 for direct wet exposure) matches the environment either way.
- Might you expand this run later? If yes, oversize the driver and lean 24V now to avoid adding feeds later.
Worked example: A kitchen cove needs 9 meters of 10W/m strip. Total wattage is 90W. On 12V, that’s 9A, which likely requires splitting into two feeds given the 5-meter drop limit. On 24V, that’s 4.5A, comfortably running as a single feed with one driver. For this run length, 24V is the cleaner build.
Pro Tip: When in doubt between the two, default to 24V for anything you might extend later. Adding a driver and rewiring a 12V run after the fact costs far more time than sizing it right the first time.
Common Installation Mistakes to Avoid
Most strip failures trace back to a handful of avoidable errors, not bad hardware.
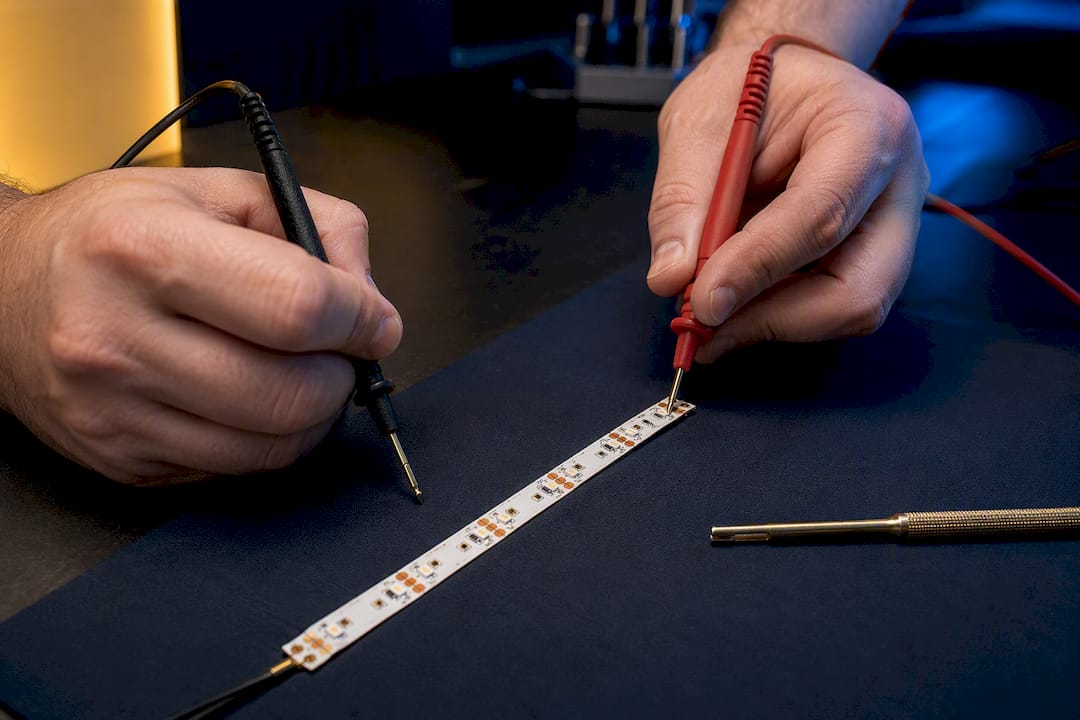
- Test both strip and driver voltage with a multimeter before final connection. Don’t trust the label alone.
- Undersized wire is the top cause of dimming complaints on longer 12V runs. When in doubt, upsize the gauge.
- Label every feed point during install. Troubleshooting a dark section months later is much faster with clear labels.
- Match IP rating to environment: IP65 for covered outdoor spots, IP67 or higher for direct rain and snow exposure.
- Underspecified drivers overheat and shorten strip life even when they technically power the load.
Pro Tip: If your project involves a roofline, permanent exterior run, or anything requiring a ladder above the second story, that’s the point where calling a professional installer costs less than an ER visit or a redo.
When Pros Reach for 24V and When Homeowners Should Stick with 12V
On the job, permanent exterior and perimeter lighting almost always points us toward 24V. Fewer feed points mean cleaner wiring behind fascia and soffits, and lower current means less heat stress over a decade of runtime. That reasoning shapes how Capital Pro Lighting designs every track we install, backed by more than 10 years of local installs, phone app color control, and a lifetime parts warranty on the hardware.
For a short cabinet strip or a car interior, 12V still makes more sense. For anything permanent on a roofline, talk to a professional before you commit to a rail.
— Luis T
Ready for a Permanent Lighting Upgrade?
DIY strip projects work well for cabinets, closets, and short accent runs. Roofline and full perimeter lighting is a different animal entirely, with driver sizing, weatherproofing, and years of thermal cycling all working against a rushed install. Capital Pro Lighting builds every permanent outdoor lighting system around that reality: custom 3D printed brackets for a clean finish, a lifetime parts warranty on the track itself, and phone app control so you switch colors for a holiday or a game night without ever touching a ladder again.
Over 10 years serving homeowners across the Capital Region, we’ve sized enough drivers and run enough wire to know where DIY installs typically go wrong on long architectural runs. If you’re weighing a permanent roofline system instead of another round of seasonal strip lights, check our service area coverage and request a consultation to get a plan built around your home’s actual run lengths and power needs.
Sources
For deeper voltage drop charts and run-length tables by wattage, see the LED Strip Voltage Guide from LED Lab and SunRoLEDs’ voltage drop breakdown for technical specifications beyond the scope covered here.
- LED Strip Voltage Drop Guide 2025 | 12V vs 24V vs 48V Explained
- 12-Volt vs. 24-Volt LED Strip Lights: What’s the Difference?
- LED Strip Voltage Guide - 5V vs 12V vs 24V vs 48V Compared | LED Lab
- 12V vs 24V LED Strip Light: Choosing the Best Option 2026 - eufy US
FAQ
Is 12V or 24V Better for LED Lights?
Neither is universally better. 12V suits short runs under 16 feet and vehicle installs, while 24V suits longer continuous runs and permanent architectural lighting because of reduced voltage drop.
Can You Run a 24V Strip on a 12V Power Supply?
No. A 24V strip on a 12V supply will glow dimly or not at all because it’s built to require double the voltage to push current through its full LED series circuit.
Can You Run a 12V Strip on a 24V Power Supply?
No, and this is the more dangerous mistake. A 12V strip fed 24V will overdrive almost instantly, typically burning out the LEDs or resistors within seconds.
What Is the Main Advantage of 24V Over 12V?
24V draws half the current for the same wattage, which means longer single-feed runs, less heat, and fewer power feeds needed on long installations.
Does Capital Pro Lighting Use 12V or 24V for Permanent Installs?
Capital Pro Lighting typically specifies 24V systems for permanent roofline and perimeter installs, since fewer feed points and lower current suit long, continuous architectural runs better.
Ready for a Brighter Home?
Free, no-pressure quotes across the Capital Region.
No obligation. Local installer. Same-day callback.
Reviewed by Capital Pro Lighting
Capital Pro Lighting installs permanent outdoor lighting, architectural lighting, and holiday lighting across Albany and New York's Capital Region. We install UL listed permanent lighting systems and have 10 years in business. More about our team.


