
80/20 Roofline: Match Light Colors to Your House, Installer Checklist
80/20 Roofline: Match Light Colors to Your House, Installer Checklist
Use a consistent warm or neutral white, typically 3000K, as your everyday roofline scene, and reserve full-color RGBW for holidays and special accents only. Your system needs a dedicated white channel and smooth dimming, not just RGB mixing, plus a documented IP rating and CRI spec so the white stays clean year after year.
TL;DR:
- Using a consistent 3000K white for outdoor lighting provides versatility across various materials and meets most homeowners’ everyday needs.
- RGBW fixtures with a dedicated white channel ensure a clean, natural white light year-round, unlike RGB-only options that produce muddy or cool whites.
- Control systems should offer tunable white or dim-to-warm features to adjust warmth and brightness automatically or independently for seasonal and mood variations.
- Fixtures must have at least IP65 rating for typical outdoor exposure and high CRI (80 or above) to accurately render material colors, especially on stone or landscape features.
- A thorough outdoor lighting plan includes commissioning with measures like color uniformity checks, matching fixtures from the same batch, and reliable automation to maintain consistent aesthetics over time.
Matching Light Colors to Your House: The 80/20 Approach
Most homeowners get one thing backward when they plan color-changing exterior lighting: they think about the fun scenes first and the everyday scene last. Flip that. The nightly white you see 300-plus times a year matters more to how your house actually looks than the Fourth of July red, white, and blue you’ll run for one weekend.
The 80/20 rule settles this trade-off cleanly. A house lit in shifting color every night stops looking intentional and starts looking like a sports bar. A house with a steady, well-chosen white that occasionally shifts for a holiday or a party reads as designed.
Picking the base white comes down to three practical options:
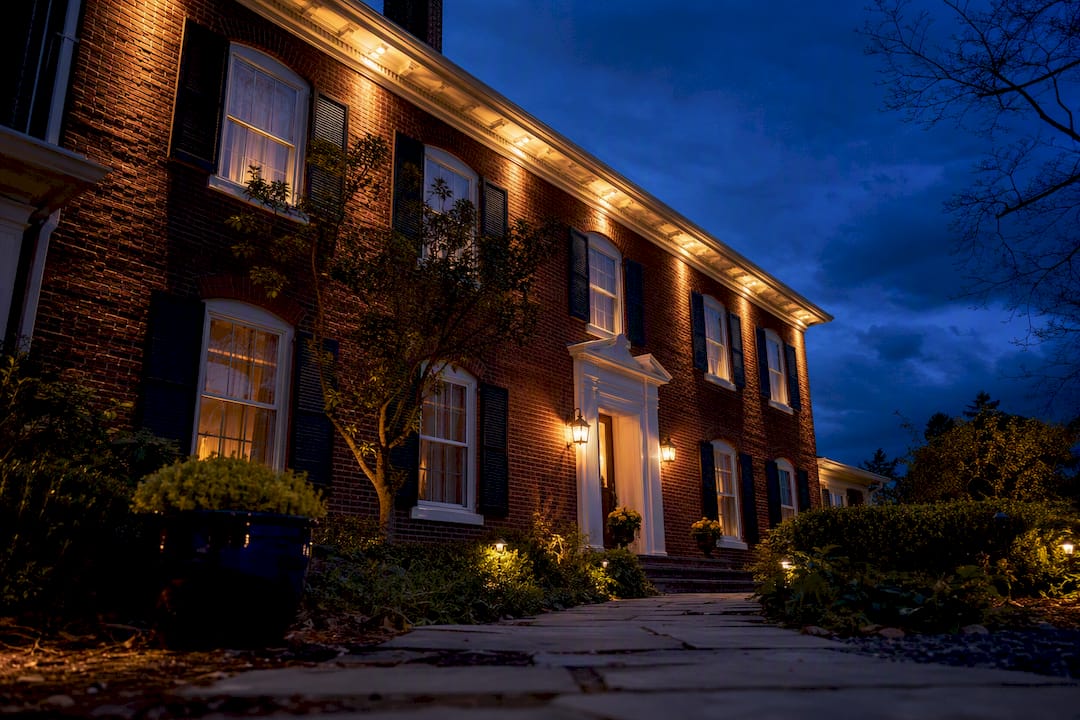
- 2700K suits heritage homes, brick colonials, and anywhere you want that classic incandescent warmth.
- 3000K works as the default for most properties because it’s the most versatile choice across mixed materials like stone, wood, and vinyl siding.
- 4000K fits modern builds with metal panels, large glass, and crisp geometric lines.
Here’s the technical detail installers care about and homeowners often miss: RGB-only fixtures can’t produce a truly clean white. Mixing red, green, and blue LEDs to approximate white leaves you with a slightly cold or muddy result. That’s why RGBW fixtures include a dedicated white channel separate from the color LEDs. You get full-color capability when you want it and a genuinely warm, accurate white the other 300 nights a year. If your installer is only offering RGB without the “W,” you’re trading color range for a compromised everyday look.
Dim-to-Warm, Tunable White, or Full Color: What Your Controls Actually Need to Do
Before picking colors, you need to know what your control system is capable of, because the wrong hardware locks you out of the right look. Three technologies cover almost every residential and small-business scenario.
Dim-to-warm fixtures shift color temperature lower as you dim them, mimicking how an old incandescent bulb glows amber when turned down low. This is a single-input control, meaning one dimmer or app slider handles both brightness and warmth automatically. It’s a good fit if you want that cozy, nostalgic feel without managing two separate settings.
Tunable white gives you independent control over both brightness and color temperature, so you can run 2700K for a quiet Tuesday and bump to 4000K for a crisper look on a night you’re hosting. This requires two inputs instead of one, which means slightly more sophisticated control hardware, but it gives you far more flexibility across seasons and moods.
Full color systems, built on RGB, RGBW, or RGBWW fixtures, unlock the widest range but come with the most complexity. Larger installations often rely on DMX512 protocols with precise per-channel values to keep every fixture synchronized. For a typical home roofline, RGBW is the sweet spot: full color when you want it, a genuinely clean white the rest of the time.
Your controller options generally break into three tiers:
- App-based systems for phone control of scenes and schedules, ideal for most residential installs.
- DMX512 for complex, multi-zone color choreography, more common on commercial or elaborate estate projects.
- 0 to 10V or DALI protocols specifically for dimming and tunable white applications without full color.
Pro Tip: Ask your installer whether the app lets you set a default “return to white” scene after any color event ends. Without it, you’re stuck manually resetting the color every time a holiday scene finishes running, which defeats the whole point of automation.
How Your House’s Materials Should Drive Your Color Choices
Light doesn’t land on a blank canvas. It hits brick, stone, wood, stucco, metal, and landscaping, and each surface reflects color temperature differently. Ignore this and even a technically correct light plan can look off.
Warm whites in the 2700K to 3000K range bring out the natural richness in red brick, cedar siding, and warm-toned stone. These materials already carry amber and brown undertones, and a warmer white reinforces that instead of fighting it. Cooler whites, generally 3500K to 4000K, suit metal roofing, glass storefronts, and contemporary facades where you want a cleaner, more architectural edge rather than a cozy glow.
Deciding where to place accents matters as much as picking the temperature. Here’s a practical approach by property type:
- Traditional homes (brick, wood trim, pitched rooflines): run 2700K to 3000K along the roofline, add subtle uplighting on entry columns, and skip color scenes except for major holidays.
- Modern builds (metal panels, flat rooflines, large glass): use 3500K to 4000K along clean architectural lines, highlight any geometric overhangs, and let color accents emphasize entry features rather than the whole facade.
- Mixed-material properties (stone base, wood upper level, metal accents): default to 3000K since it’s the most versatile compromise across materials, then use targeted accent fixtures on specimen trees or landscaping for contrast.
One detail that separates a clean install from a patchy one: every fixture on your house needs to come from the same binning group. Fixtures from mismatched batches, even at the same rated color temperature, can show visibly different whites side by side. If you’re weighing exterior finishes alongside your lighting plan, it’s worth looking at how painted surfaces and trim colors respond to different light temperatures before committing to either.
Setting Up Scenes and Schedules That Actually Stay Consistent
A lighting system is only as good as its programming. Plan for at least three scene types: a default white scene for every regular night, one or two event scenes for holidays or gatherings, and a recall schedule that returns automatically to default white when the event ends.
Transitions matter more than most people expect. A fixture that snaps from red to white instead of fading smoothly looks cheap, and flicker becomes especially obvious on video or in photos taken for real estate listings or social media. Low-flicker drivers and smooth fade curves are worth specifying by name when you talk to an installer.
If your roofline spans multiple zones or a large property, make sure everything runs on a single controller or a properly networked set of controllers. Split systems that aren’t synced tend to drift out of alignment over months, with one section running slightly warmer or slower to transition than another.
Before calling any install finished, insist on a commissioning checklist:
- Bench-test every fixture together before mounting, not just individually.
- Let fixtures warm up for 30 to 60 minutes and recheck color consistency after that warm-up period.
- Verify binning and color uniformity across the entire run, not just a sample.
- Check for voltage drop on long runs and confirm surge protection is in place.
Pro Tip: Take a photo of your default white scene the night your install finishes commissioning. Six months later, compare it. Genuine color drift from aging LEDs or a bad batch shows up clearly in that side-by-side, and it’s your evidence if a warranty claim is needed.
The Specs That Prevent Color Problems Down the Road
Ask your supplier or installer for these numbers before signing anything, because vague answers here are where most post-install disappointment starts.
IP rating should be IP65 at minimum for standard exterior exposure. If fixtures sit in open ground exposed to heavy rain or irrigation spray, step up to IP66 or IP67. Anything that could end up submerged, like a low landscape accent near a drainage path, needs IP68.
CRI (Color Rendering Index) should sit at 80 or higher across the board, with 90-plus specified anywhere color accuracy really matters, such as lighting that highlights natural stone or landscaping where subtle color variation is part of the appeal. Low CRI light can wash out material color even at the “right” temperature.
Beyond those two numbers, request details on:
- Driver type and flicker performance, since cheap drivers are the most common source of visible flicker on camera.
- Operating temperature range and thermal management, particularly for fixtures mounted close to roofing material.
- Surge protection and voltage-drop planning for longer wire runs.
- Binning group documentation and batch testing records, plus a clear warranty.
A lifetime parts warranty on the actual track installation is one of the strongest signals a company stands behind its own workmanship, and it’s worth asking any installer whether that’s part of their standard offer.
Why Your House Looks Different at 8 AM Than at 8 PM
Sunlight color temperature swings dramatically across a single day, and that shift changes how your exterior lighting looks even when the fixtures never change their setting. Early morning light runs cool and blue, often above 5000K. Midday sun sits closer to neutral, around 5500K to 6500K. Late afternoon and golden hour drop into warm territory, sometimes below 3000K, which is exactly why sunset photography looks so flattering.
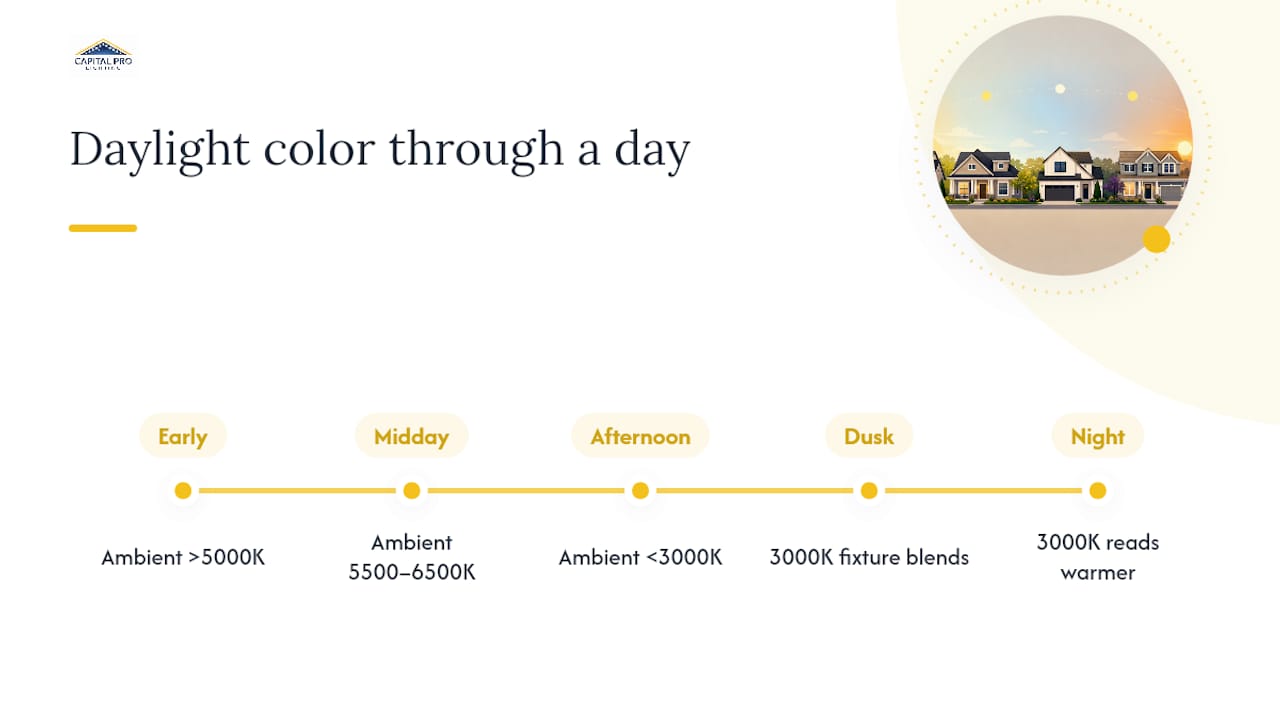
This matters for exterior lighting because your fixtures are competing with or complementing ambient daylight for a good portion of the evening, not operating in total darkness. A 3000K roofline light turned on at dusk during golden hour will blend almost seamlessly with the ambient warmth outside. The same fixture turned on well after dark, competing only with streetlights and a black sky, will read as more distinctly warm and golden by contrast.
This is also why testing a light color at noon tells you almost nothing useful. If you evaluate a sample fixture in bright midday sun, the color will look washed out and hard to judge accurately, because your eyes are calibrated to a much brighter, cooler ambient light. The only reliable time to judge exterior lighting color is after dusk, once ambient light has dropped enough that the fixture’s true color reads clearly. Evaluate the same fixture on two or three different nights, including one with a clear sky and one with overcast conditions, since cloud cover changes how ambient light interacts with your roofline lighting even after dark.
How to Actually Test Colors Before You Commit
Never choose a permanent color scheme from a screen or a showroom sample. The fixture that looked perfect on a manufacturer’s website photo, shot in ideal lighting conditions with professional color grading, can look completely different mounted on your actual roofline against your actual siding.
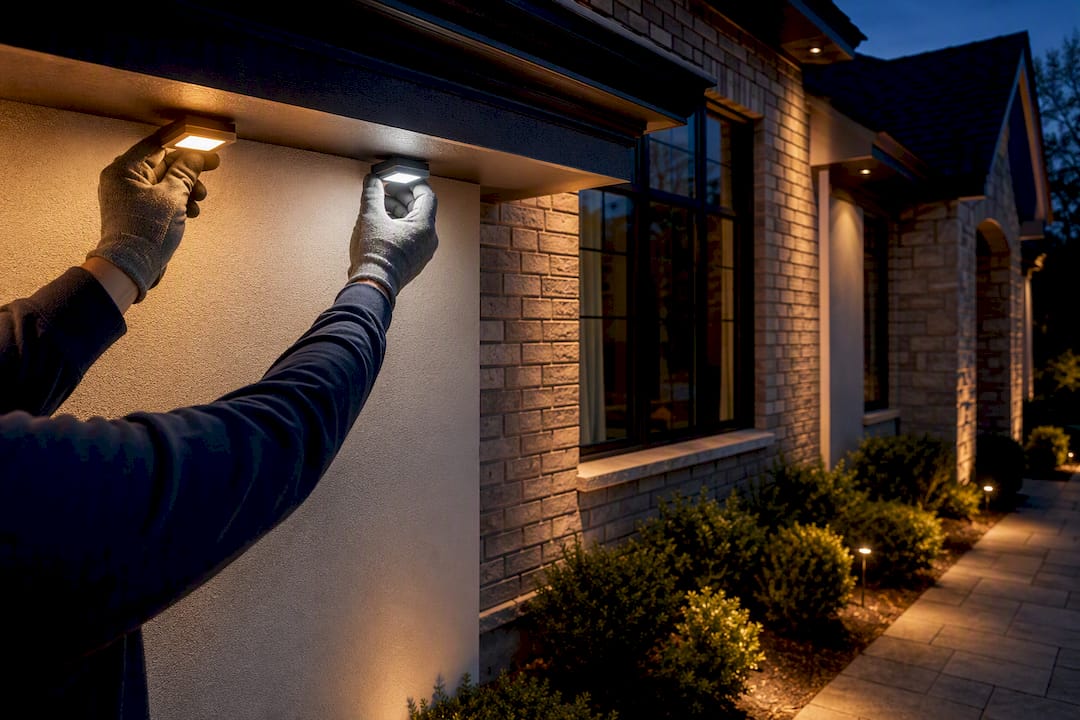
Request a live demo on your own property before finalizing anything. A reputable installer should be able to bring a sample fixture or two and mount them temporarily so you can see the real color against your real brick, siding, or trim, at the actual mounting height and angle they’ll use for the finished install.
Test at the time of day you’ll actually see the lighting most. If your household is out and about until 9 PM most nights, testing at 6 PM golden hour won’t tell you what your regular experience will look like. Walk the property from the street, from your driveway, and from wherever you’ll actually be sitting on a porch or patio, because color perception shifts depending on viewing angle and distance.
Compare at least two color temperature options side by side rather than evaluating one option in isolation. Human perception of color temperature is relative. A 3000K sample can look warm compared to 4000K but cool compared to 2700K, and you’ll make a better decision seeing the actual contrast rather than judging a single option against memory or imagination.
Take photos and videos during your test, not just as a keepsake but as a decision-making tool. A quick phone video, viewed later on a bigger screen, often reveals flicker or color unevenness your eye missed while standing outside in real time.
The Most Common Ways People Get This Wrong
The single biggest mistake is choosing color temperature purely from a swatch or a phone screen. Screens have their own color calibration, which rarely matches how an LED fixture will actually render against real siding, brick, or landscaping outdoors after dark.
A close second: running full-color scenes every single night. It might feel exciting the first month, but neighbors and even homeowners themselves tend to describe a permanently multicolor house as looking more like a display than a home. That constant novelty wears off fast, and it’s part of why the 80/20 approach toward a steady white base holds up so well over time.
Mismatched color temperature across different areas of the same house is another frequent pitfall, usually caused by buying fixtures from different manufacturers or different batches without checking binning consistency. One section of roofline reading noticeably warmer or cooler than another, even by a small margin, catches the eye in a way that looks unfinished rather than intentional.
Skipping a CRI check is a quieter but costly mistake. Two fixtures can carry the identical 3000K rating on the box and still render your brick or stone completely differently if their CRI ratings differ. Low CRI fixtures can make rich reds look flat and browns look muddy, even at a technically correct color temperature.
Finally, plenty of homeowners underspec their control system, choosing basic on/off color-changing fixtures because they’re cheaper up front, then discover a year later they have no way to dial in the specific warm white they actually wanted. Paying slightly more up front for a system with a dedicated white channel and real dimming control avoids that regret entirely.
The Psychology Behind Why Certain Light Colors Feel Different
Color temperature does more than affect how materials look. It shapes how people feel standing in front of your house, and that emotional read matters for a home just as much as it matters for a hotel lobby or restaurant entrance.
Warm light, generally 2700K to 3000K, reads as inviting, relaxed, and traditional. It’s the same psychological register as candlelight or a fireplace, which is exactly why it works so well on entryways and porches where you want visitors to feel welcomed rather than inspected. Warm tones also tend to make a space feel smaller and more intimate, which flatters cozy architectural styles but can occasionally mute a large, dramatic facade.
Cooler light, in the 3500K to 4000K range, reads as clean, modern, and alert. It’s the same register as daylight or a well-lit retail space, and it tends to make a facade feel larger, sharper, and more architectural. That’s why it pairs so naturally with metal, glass, and contemporary geometric lines, but the same crispness can feel cold or clinical against a traditional brick colonial.
Full color introduces an entirely different psychological layer tied to specific hues rather than temperature. Blue and green tones tend to read as calm or celebratory depending on context, red carries urgency and warmth in equal measure, and rapidly shifting multicolor patterns read as festive or high-energy. That’s precisely why color works best reserved for moments meant to stand out, a party, a holiday, a team victory, rather than as the emotional register you want greeting you and your neighbors on an ordinary Tuesday night.
What a Good Consultation Should Cover
Before you call anyone for a quote, put together a short packet: photos of your house from the street at dusk, your preferred default color temperature if you already have one, the specific architectural features you want highlighted, whether you want app or more advanced control, a rough budget range, and what warranty coverage you expect.
Capital Pro Lighting brings phone-controlled color changes, custom 3D-printed brackets for a cleaner mounting finish than off-the-shelf clips, and a lifetime parts warranty on track installations backed by over ten years of local experience in the Capital Region. That combination of workmanship consistency and long-term support is exactly what separates a roofline that looks sharp for one season from one that still looks sharp in five years.
Choosing a local installer over a larger national outfit often comes down to accountability. A local team that’s been servicing the same neighborhoods for a decade has a direct stake in getting your binning, your CCT, and your commissioning right the first time.
— Luis T
Ready to Get Your Roofline Right
Skip the ladder climbing and the guesswork. Capital Pro Lighting installs permanent, phone-controlled roofline and accent lighting built around exactly what this article covers: a clean everyday white, custom color-matched tracks, and full-color scenes on standby for the nights you actually want them.
A typical engagement starts with a consultation at your property, where you’ll walk through your default color temperature, your architectural features, and your budget. From there, Capital Pro Lighting builds a design mockup, handles the install with those signature 3D-printed brackets for a clean finish, and commissions the system before handing over the app controls. Every track installation carries a lifetime parts warranty, so the color you fell in love with during setup stays consistent for years, not just the first season.
If you’re in the Albany-Schenectady-Troy area, check service coverage across the Capital Region or head straight to the Capital Pro Lighting homepage to request a consultation and see real project examples before your next holiday season sneaks up on you.
Sources
- Color Tuning with Lutron Controls APP NOTE (048579)
- Architectural Floodlighting Design : RGBW Planning Guide and Pitfalls - RC Lighting
- How to Choose Color Temperature for Outdoor Architectural Lighting (2700K vs 3000K vs 4000K + RGBW) – Daou Lighting
FAQ
What color temperature should I use for everyday exterior lighting?
3000K works as the most versatile default across mixed materials; choose 2700K for heritage brick homes or 4000K for modern metal-and-glass facades.
How often should I actually use full color instead of white?
Follow the 80/20 rule: reserve full-color RGBW scenes for roughly 10 to 20% of nights, holidays, and events, keeping white as your everyday base.
What’s the difference between RGB and RGBW lighting?
RGB mixes red, green, and blue LEDs to approximate white, which often looks cold or muddy, while RGBW adds a dedicated white channel that produces a genuinely clean everyday white alongside full color capability.
What IP rating do I need for exterior roofline lighting?
IP65 covers most standard exterior exposure, but fixtures near heavy rain, sprinklers, or ground-level moisture should be rated IP66 to IP68.
Does Capital Pro Lighting offer phone-controlled color changes?
Yes. Capital Pro Lighting installs permanent roofline and accent lighting with phone-app control for switching between white and full-color scenes, backed by a lifetime parts warranty on track installations.
Recommended
Ready for a Brighter Home?
Free, no-pressure quotes across the Capital Region.
No obligation. Local installer. Same-day callback.
Reviewed by Capital Pro Lighting
Capital Pro Lighting installs permanent outdoor lighting, architectural lighting, and holiday lighting across Albany and New York's Capital Region. We install UL listed permanent lighting systems and have 10 years in business. More about our team.


